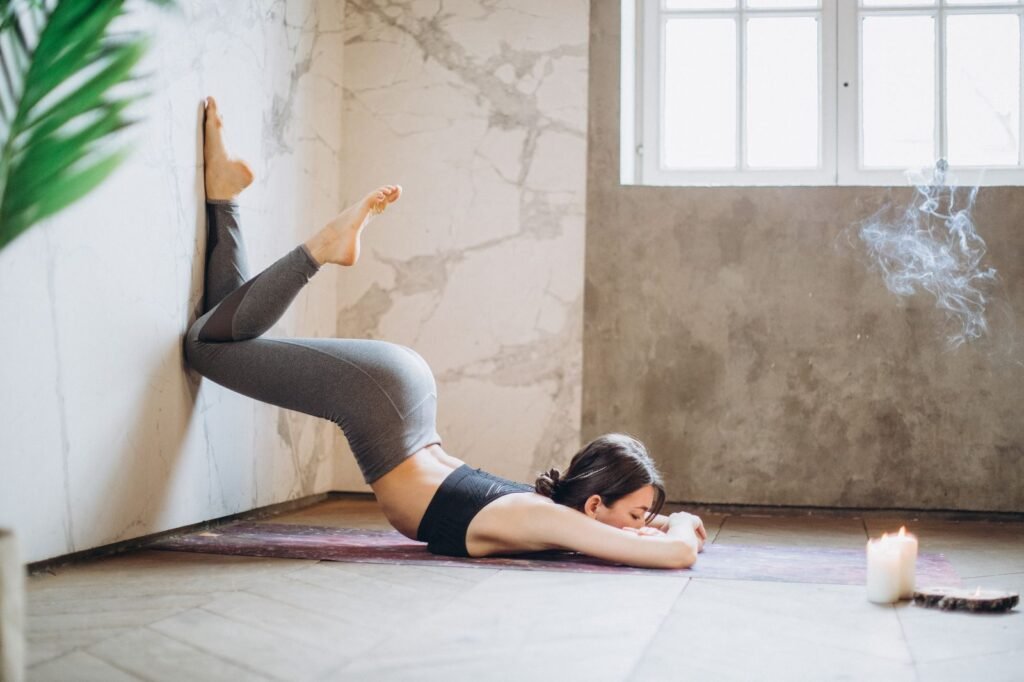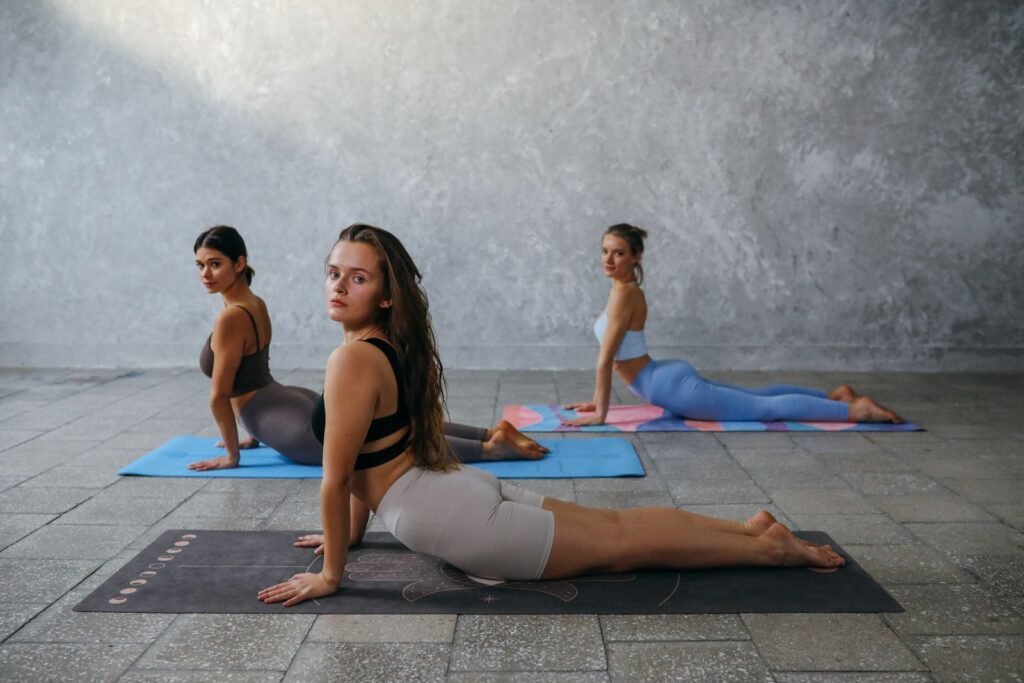
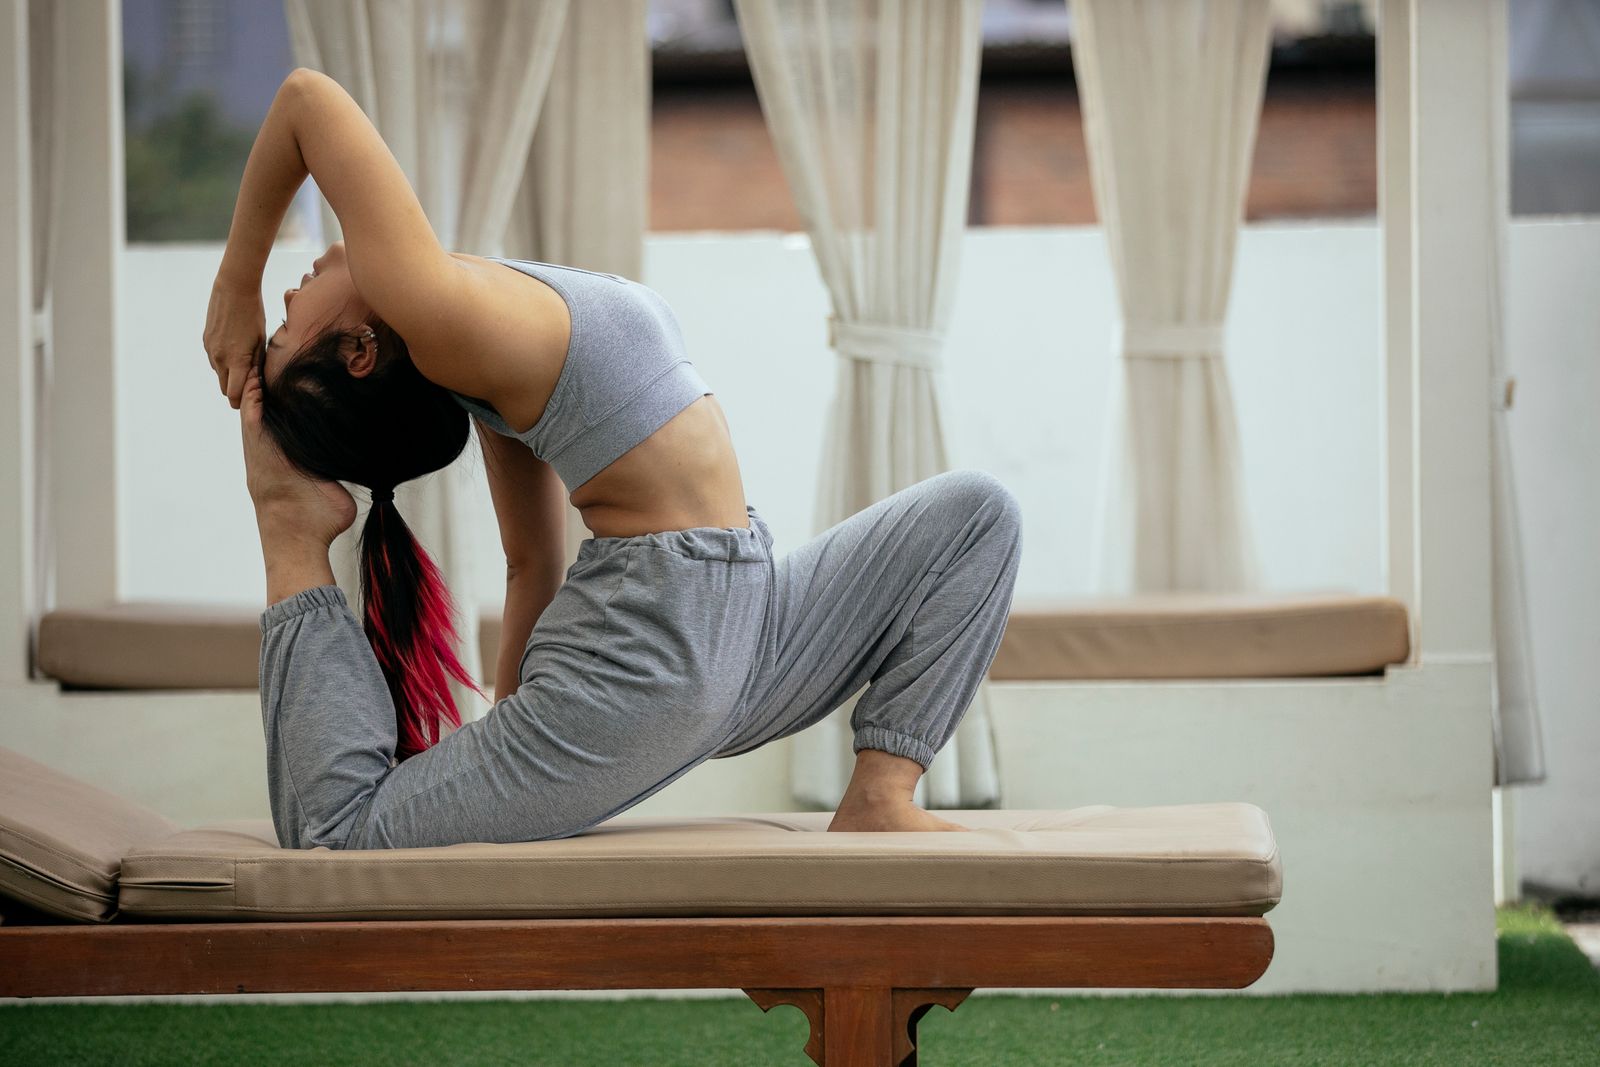
Kapotasana, known in English as Pigeon Pose, is a hip-opening backbend where the front leg bends at roughly 90 degrees across the mat while the back leg extends straight behind you, deepening into either a seated hip stretch or, in its fuller expression, a backbend that reaches the arms overhead to hold the back foot. Most yoga traditions actually use “Kapotasana” and “Pigeon Pose” to describe a family of related shapes, ranging from the gentle Eka Pada Rajakapotasana (One-Legged King Pigeon Pose) commonly taught in beginner classes to the intense full backbend of classical Kapotasana found in advanced Hatha and Ashtanga sequences. It’s prized for releasing tight hip rotators and hip flexors, a common problem area for anyone who sits for long stretches, while the deeper variations also open the chest, shoulders, and spine. Because the pose ranges so widely in intensity, it’s approachable for beginners with props and demanding enough to challenge advanced practitioners for years.
What Does Kapotasana Mean?
Kapotasana comes from the Sanskrit words “kapota,” meaning dove or pigeon, and “asana,” meaning pose or seat. The name reflects the shape of the chest lifting and puffing forward in the full backbend variation, resembling a pigeon’s chest, and in the seated hip-opening variation, the folded front leg and long back leg loosely echo a resting bird’s silhouette. In most modern studio classes, the name “Pigeon Pose” typically refers to Eka Pada Rajakapotasana preparation, the accessible hip-opening shape, while “Kapotasana” or “King Pigeon Pose” more precisely refers to the advanced backbend variation with the arms reaching overhead. This guide covers both ends of that spectrum, since students searching for kapotasana are usually looking to understand the full family of pigeon-related poses.
How Do You Perform Pigeon Pose Step by Step?
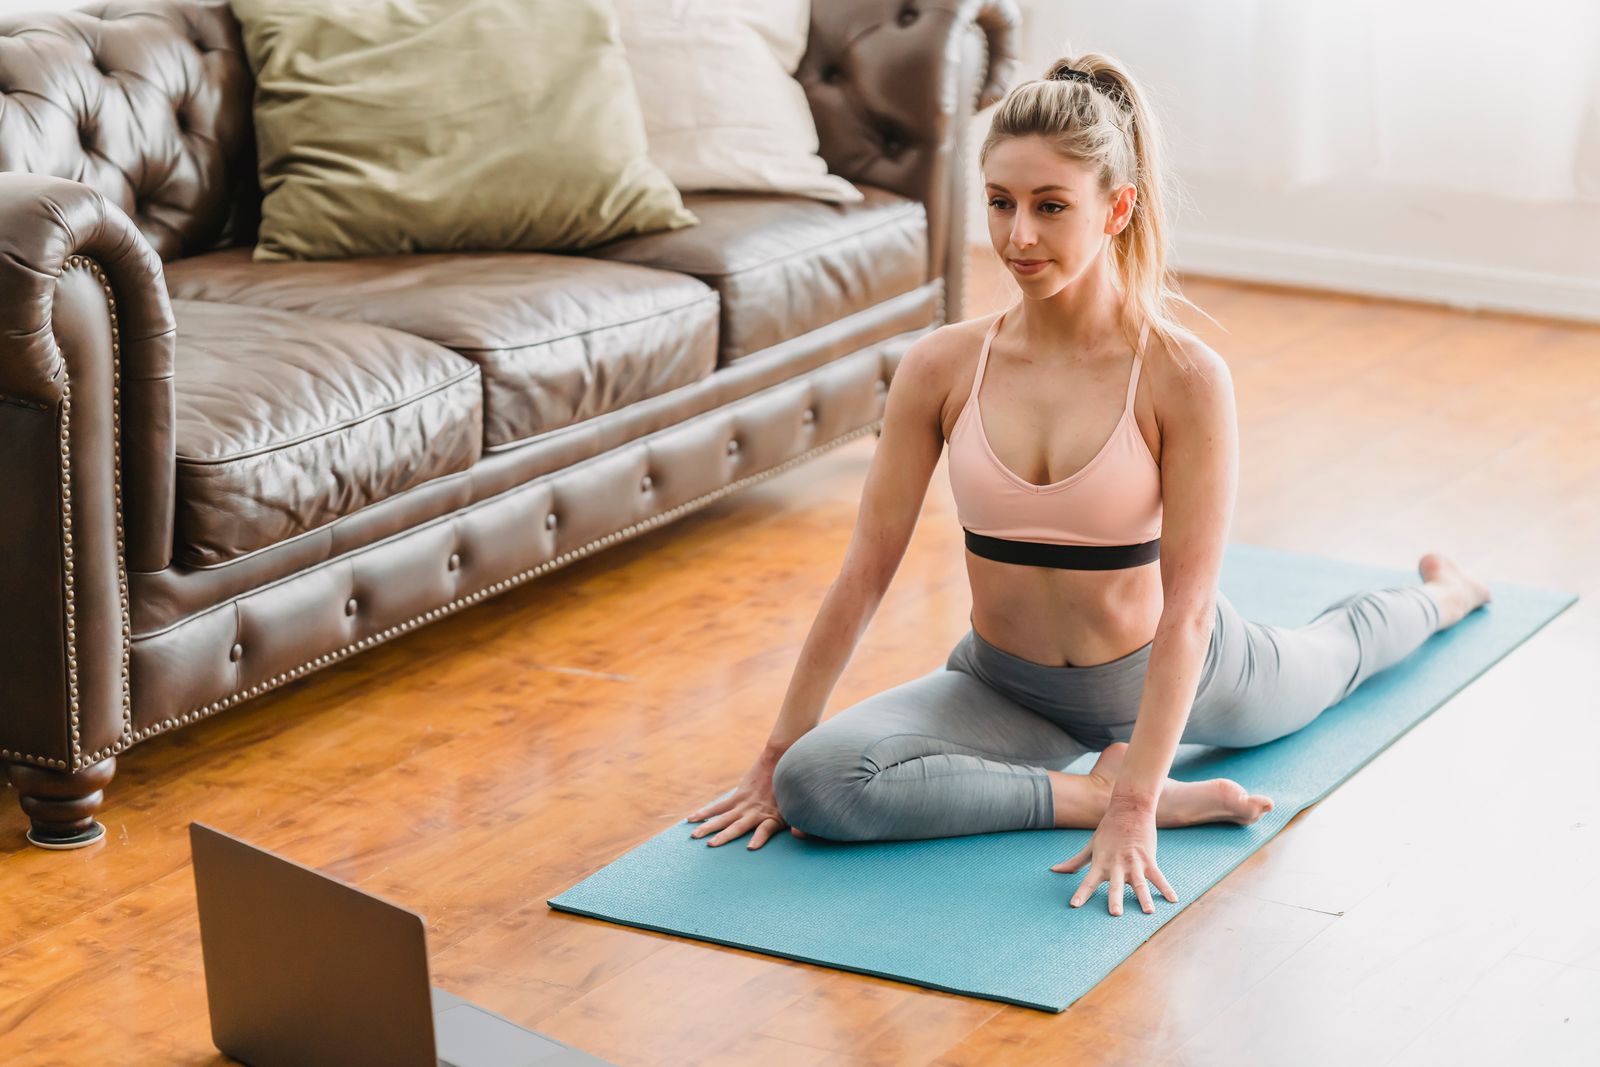
Begin in a tabletop position on your hands and knees, then bring your right knee forward and place it behind your right wrist, angling your right shin so it rests roughly parallel to the front of the mat if your hips allow it, though a steeper diagonal is completely fine for tighter hips. Slide your left leg straight back behind you, keeping the top of that foot and shin pressed into the mat, and square your hips as much as possible toward the front of the mat rather than letting the right hip lift up. Walk your hands forward and lower your torso over the front shin, resting on your forearms or folding all the way down, and hold this stretch for 30 seconds to two minutes, breathing steadily into the outer hip and glute of the front leg. To exit, press your hands into the floor, tuck the back toes under, and lift back to tabletop before repeating on the other side. This seated, forward-folding version is the foundation that every other pigeon variation, including the full backbend, builds from.
How Do You Progress Into the Full Kapotasana Backbend?
The full Kapotasana backbend is significantly more advanced, typically approached only after months or years of consistent backbend and hip-opening practice. From a kneeling position with the thighs vertical, the practitioner arches the spine backward, reaching the arms overhead and eventually down to the floor behind the feet, then walks the hands further back to clasp the heels or soles of the feet while the crown of the head rests toward or on the floor. This demands deep thoracic spine extension, exceptional shoulder flexibility, and strong quadriceps and hip flexor length simultaneously. Most teachers recommend building the foundation with simpler backbends first, such as Bhujangasana and Ustrasana, before attempting the full expression of Kapotasana, and only under the direct supervision of an experienced teacher.
What Are the Benefits of Pigeon Pose?
Pigeon Pose is one of the most widely taught hip-openers in modern yoga, and its benefits extend well beyond flexibility alone.
- Releases tight hip rotators: The piriformis and other deep external rotators of the front leg’s hip lengthen significantly in the folded position, which is particularly valuable for people who sit for most of the day.
- Stretches the hip flexors of the back leg: The extended back leg lengthens the psoas and iliacus, muscles that shorten from prolonged sitting and can contribute to lower back discomfort when chronically tight.
- May ease lower back tension: Because tight hips often pull on the pelvis and lower spine, releasing the hip rotators and flexors together is commonly associated with reduced compensatory strain on the lower back, though it should complement rather than replace guidance from a physiotherapist for anyone with an existing back condition.
- Opens the chest and shoulders in the fuller variations: As the pose progresses toward the backbend expression, reaching the arms overhead stretches the pectorals, front shoulders, and hip flexors all at once.
- Builds body awareness around asymmetry: Most practitioners notice one hip is considerably tighter than the other in Pigeon Pose, which is valuable feedback for addressing muscular imbalances built up over years of habitual movement patterns.
- Supports recovery for runners and cyclists: The repetitive, single-plane hip motion in running and cycling tends to tighten the same rotator muscles Pigeon Pose targets, making it a popular cooldown stretch in athletic training programs.
What Muscles Does Kapotasana Stretch and Strengthen?
The front leg’s hip rotators, primarily the piriformis, gemelli, and obturator muscles, along with the gluteus maximus, receive the deepest stretch in the folded position. The back leg’s hip flexor group, the psoas major and iliacus, lengthens as that leg extends behind the body, and the quadriceps also stretch, especially if the knee bends toward a King Pigeon variation. In the fuller backbend expressions, the entire front line of the body, including the abdominals, chest, and shoulder flexors, stretches considerably, while the spinal muscles and the glutes of the bent-knee leg work isometrically to hold the shape stable.
What Are the Main Variations of Pigeon Pose?
Pigeon Pose has more variations than almost any other hip-opener, which is part of why it appears across so many different styles of practice, from restorative classes to advanced Ashtanga sequences.
Ardha Kapotasana (Half Pigeon Pose)
This is the foundational, most commonly taught version, where the practitioner folds forward over the bent front leg with the back leg extended straight behind. It’s considered the accessible entry point and the version most beginners mean when they say “pigeon pose.”
Reclined Pigeon Pose (Eye of the Needle Pose)
Performed lying on the back with one ankle crossed over the opposite knee, this variation delivers a similar hip-rotator stretch without any weight-bearing on the hips or knees, making it a gentler, floor-based alternative that’s often taught in beginner and restorative classes.
Full Pigeon Pose (Eka Pada Rajakapotasana)
Building on the half pigeon foundation, the back knee bends and the same-side hand reaches back to hold the foot, drawing the heel toward the glute or head while the chest lifts and opens. This intermediate variation adds a quadriceps stretch and a mild backbend to the basic hip-opening shape.
King Pigeon Pose (Rajakapotasana)
The most advanced expression, where both hands eventually reach back to clasp the back foot while the spine arches deeply and the head tilts back to touch the sole of the foot. This variation requires significant shoulder, spine, and hip flexibility built up over sustained, patient practice.
Supported Pigeon Pose with Props
Placing a folded blanket or bolster under the front hip, especially when that hip doesn’t reach the floor comfortably, allows the muscles to relax into the stretch rather than gripping to compensate for the gap, and is one of the most useful modifications for tighter-hipped practitioners of any level.
Who Should Avoid or Modify Pigeon Pose?
Anyone with an acute knee injury, meniscus damage, or recent hip surgery should approach Pigeon Pose cautiously or avoid it entirely, since the front knee bears rotational stress that can aggravate an already compromised joint. People with sacroiliac joint instability or a history of hip impingement should keep the front shin at a steeper, more comfortable angle rather than forcing it parallel to the mat edge, and using a bolster under the hip is strongly recommended. Pregnant practitioners can generally continue the seated variation with props, though the full backbend expressions should be avoided. Anyone recovering from a lower back injury should be especially cautious with the deeper backbend variations, since they load the lumbar spine significantly, and should build toward them gradually under the guidance of a qualified instructor, such as through online yoga classes, where alignment can be corrected in real time.
What Are the Most Common Mistakes in Pigeon Pose?
The most frequent error is letting the front hip lift off the floor to compensate for tight hip rotators, which reduces the stretch’s effectiveness and can create uneven pressure across the knee joint. Another common mistake is forcing the front shin into a fully parallel position before the hips have the mobility to support it safely; a steeper diagonal angle is a completely valid and often safer starting point. Many practitioners also let the back leg turn outward instead of keeping the top of the foot and shin pressing into the mat, which reduces the hip flexor stretch on that side. In the deeper backbend variations, rushing to reach the feet before the shoulders and spine have adequately warmed up is a common cause of strain.
How Does Pigeon Pose Compare to Other Hip Openers?
Pigeon Pose targets the hip rotators and flexors more intensely than most seated hip stretches because it combines external rotation of the front hip with extension of the back hip simultaneously, rather than isolating one movement at a time. Baddha Konasana (Bound Angle Pose), by comparison, opens the hips through a symmetrical, seated external rotation without the back-leg extension component, making it gentler but less comprehensive. Malasana (Garland Pose) opens the hips through a deep squat pattern that also stretches the ankles and inner thighs, engaging a different plane of hip mobility altogether. Many well-rounded yoga for hip pain routines include Pigeon Pose alongside these other shapes precisely because each one addresses hip mobility from a distinct angle.
When Should You Practice Pigeon Pose in a Sequence?
Pigeon Pose works best after the hips and legs have already warmed up, typically following a series of standing poses or a few rounds of Surya Namaskar, since cold hip rotators are considerably less pliable and more prone to strain. It’s commonly placed toward the latter half of a practice, often just before or within a seated and floor-based sequence, allowing the body to transition naturally from standing work into deeper stretching. Following Pigeon Pose with a brief counter-stretch, such as a gentle forward fold or a hip-neutral pose like Tadasana, helps the hips and lower back settle evenly before moving on to the next posture.
Can Beginners Practice Kapotasana Safely?
Yes, as long as beginners start with the basic Ardha Kapotasana shape and use props generously rather than attempting the full backbend variation right away. Placing a folded blanket or bolster under the front hip removes strain from an unsupported gap between the hip and the floor, and staying propped up on the forearms rather than folding all the way down is a perfectly complete practice of the pose. Building general hip and spine mobility first through a broader yoga for beginners routine makes the eventual transition into pigeon variations considerably more comfortable and reduces the temptation to force a shape the body isn’t ready for yet.
How Does Pigeon Pose Support Flexibility and Recovery?
Because Pigeon Pose targets the same hip rotator and flexor muscles that tighten from prolonged sitting, running, and cycling, it’s frequently recommended as part of broader yoga for flexibility routines. Holding the stretch for one to two minutes per side, with slow, steady breathing, allows the nervous system time to reduce the muscle’s protective tension response, which tends to be more effective for lasting flexibility gains than shorter, bouncier stretching. Pairing Pigeon Pose with a consistent pranayama practice can further support the relaxation-oriented state that makes deep stretching more sustainable over time.
What Breathing Pattern Works Best for Pigeon Pose?
Inhale as you square the hips and begin lowering the torso toward the front leg, using the breath to lengthen the spine rather than collapsing forward. Once folded, breathe slowly and evenly into the outer hip and glute of the front leg, allowing each exhale to soften the muscle slightly further rather than forcing a deeper stretch through effort. If you feel sharp or pinching sensations in the knee or hip rather than a general stretch, that’s a signal to back off the position and add support rather than continuing to breathe through it. In the deeper backbend variations, keep the breath calm and unforced, since the priority in Kapotasana is patient spinal extension rather than pushing to the deepest possible depth in a single session.
How Does Pigeon Pose Fit Into a Broader Yoga Practice?
Pigeon Pose rarely stands alone in a well-structured class; it’s typically woven into a sequence that also includes standing poses like Vrksasana for balance and strength, gentle backbends to prepare the spine for deeper variations, and a closing relaxation period to let the nervous system integrate the stretch. Styles like Yin Yoga often hold Pigeon Pose for several minutes at a time to target the deeper connective tissue around the hip joint, while faster-paced Vinyasa Yoga classes may move through it more briefly as part of a flowing sequence. Understanding where a pose fits within the broader landscape of yoga poses makes it easier to build a balanced personal practice rather than repeating the same few shapes.
Questions People Ask About Kapotasana
What is Kapotasana called in English?
Kapotasana is called Pigeon Pose in English, and the name is used loosely across a family of related shapes. Most beginner classes teach Ardha Kapotasana, or Half Pigeon Pose, the seated hip-opening version, while “King Pigeon Pose” or the full Kapotasana backbend refers to the more advanced expression with the arms reaching overhead to hold the back foot.
Is Pigeon Pose good for hip flexibility?
Yes, Pigeon Pose is widely regarded as one of the most effective hip-opening poses because it stretches the front leg’s hip rotators and the back leg’s hip flexors simultaneously. Holding the pose for one to two minutes per side with steady breathing tends to produce more lasting flexibility gains than shorter or more forceful stretching attempts.
What is the difference between Half Pigeon and Full Pigeon Pose?
Half Pigeon Pose, or Ardha Kapotasana, involves folding forward over the bent front leg with the back leg extended straight and the torso resting toward the floor. Full Pigeon Pose, or Eka Pada Rajakapotasana, adds a backbend element by bending the back knee and reaching one or both hands back to hold the foot, which requires considerably more shoulder and spine flexibility.
Can Pigeon Pose help with sciatica?
Some practitioners find that stretching the piriformis and surrounding hip rotators through Pigeon Pose eases sciatic-type discomfort, since a tight piriformis can sometimes irritate the nearby sciatic nerve. However, sciatica has many possible causes, so anyone with persistent nerve pain should consult a physician or physiotherapist before relying on any single pose to address it.
How long should you hold Pigeon Pose?
Most teachers recommend holding Pigeon Pose for 30 seconds to two minutes per side, depending on the style of class and the practitioner’s hip mobility. Restorative and Yin-style classes often extend the hold to three minutes or more with props for support, while a flowing Vinyasa class might move through it more briefly as part of a longer sequence.
Is it normal for one side to feel tighter in Pigeon Pose?
Yes, it’s extremely common for one hip to feel noticeably tighter than the other in Pigeon Pose, often reflecting habitual movement patterns, dominant-side use, or old injuries. This asymmetry is useful feedback rather than a problem to fix immediately, and working the tighter side with extra patience and appropriate props over time tends to even out the difference gradually.
Try This for Yourself
Reading about Kapotasana only goes so far; the real progress happens when an experienced teacher can watch your hip alignment, tell you exactly how much to fold or arch on any given day, and help you tell the difference between a productive stretch and a sensation that means you should back off. If you’d like personalized, real-time guidance through Pigeon Pose and the rest of your practice, join a live class through FitStrot’s online yoga classes and build hip mobility that actually lasts.
Related reading: Yoga Poses, Surya Namaskar, Tadasana, Vrksasana, and explore FitStrot’s online yoga classes to practice with expert guidance.