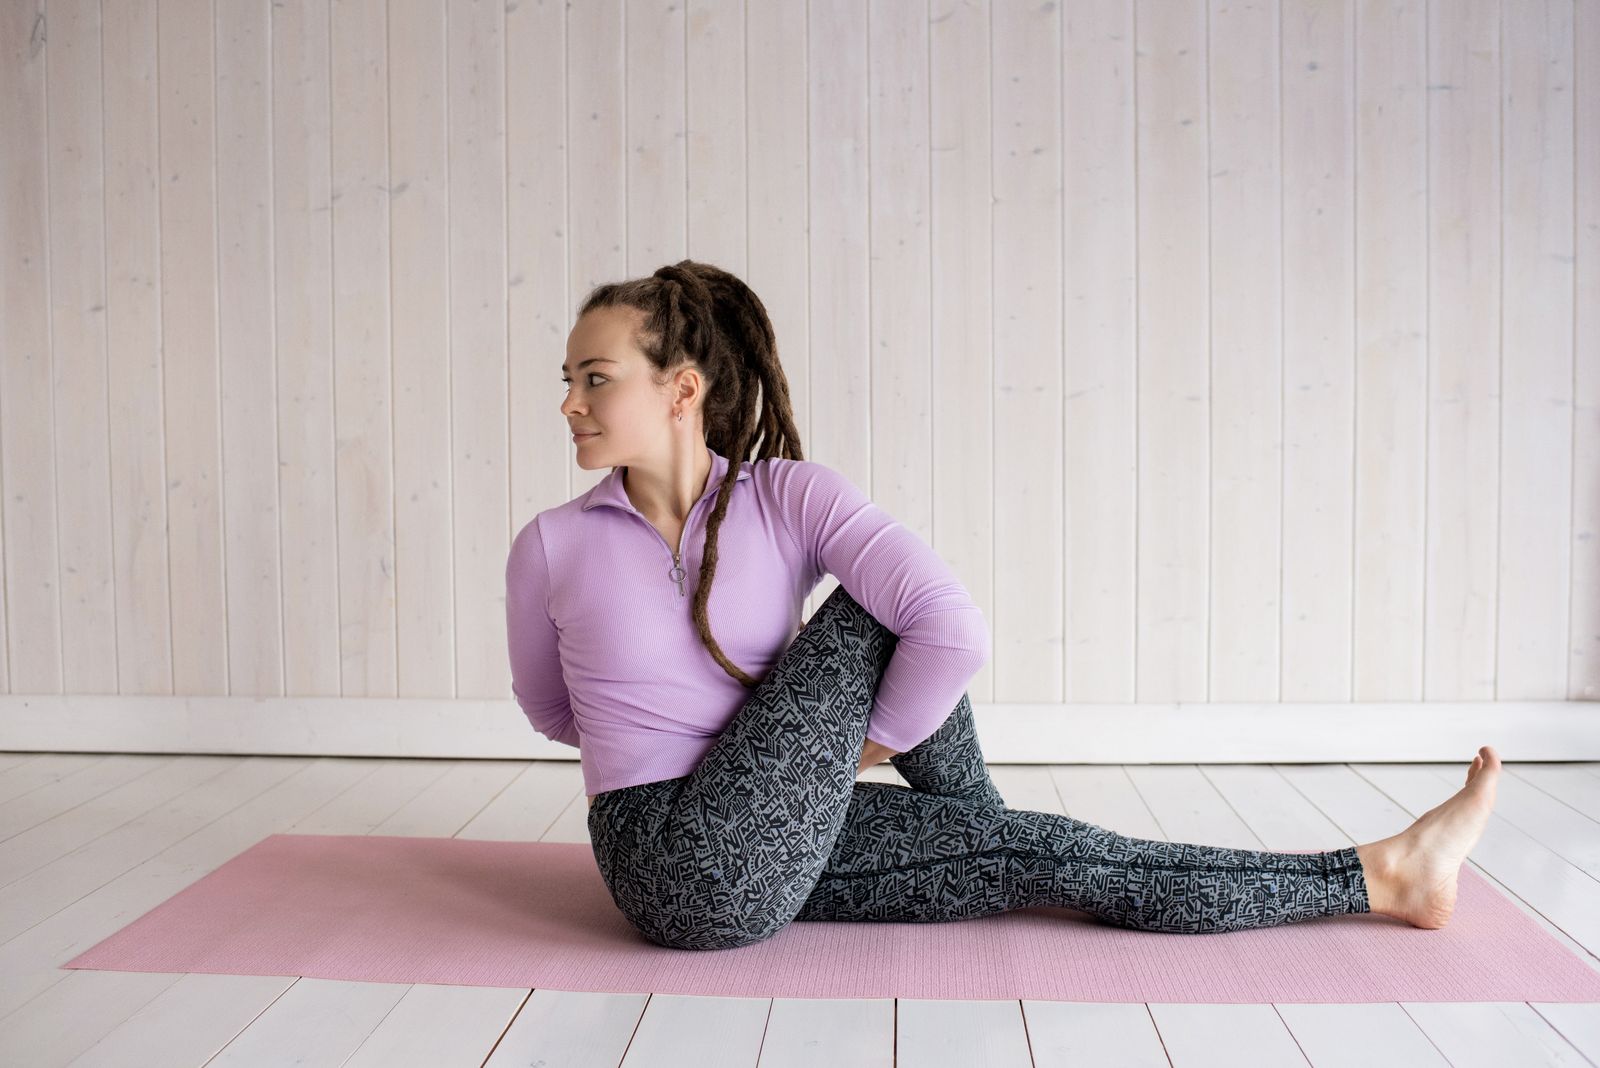
Gomukhasana, or Cow Face Pose, is a seated yoga asana where the legs are stacked knee over knee and the arms are clasped behind the back, one reaching up over the shoulder and the other coming up from below the waist. The name comes from the Sanskrit words “go” (cow) and “mukha” (face), because the shape of the folded knees is said to resemble a cow’s mouth while the elbows resemble its ears. Gomukhasana deeply stretches the hips, thighs, shoulders, and triceps in a single pose, making it a favorite for people who sit at desks all day or who want to release tightness after running, cycling, or strength training.
What Does Gomukhasana Mean and Where Does It Come From?
Gomukhasana is a compound Sanskrit word: “go” meaning cow, “mukha” meaning face or mouth, and “asana” meaning seat or posture. Classical hatha yoga texts describe the pose as resembling a cow’s face, with the crossed shins forming the jaw and the elbows pointing outward like ears. It belongs to a family of seated hip-opening postures used in traditional hatha and Iyengar sequences, often practiced before pranayama or meditation because the tall, grounded seat it creates supports long, steady breathing. If you’re new to Sanskrit asana names in general, our guide to yoga poses is a good place to see how naming conventions work across the practice.
How Do You Do Gomukhasana Step by Step?
Start in a comfortable seated position such as Staff Pose, with legs extended in front of you. Bend both knees and cross your right leg over your left, stacking the right knee directly on top of the left knee, with both heels roughly equal distance from the hips. Press evenly through both sitting bones so your pelvis stays level rather than tipping to one side. Lengthen your spine upward, lifting out of the lower back instead of collapsing forward.
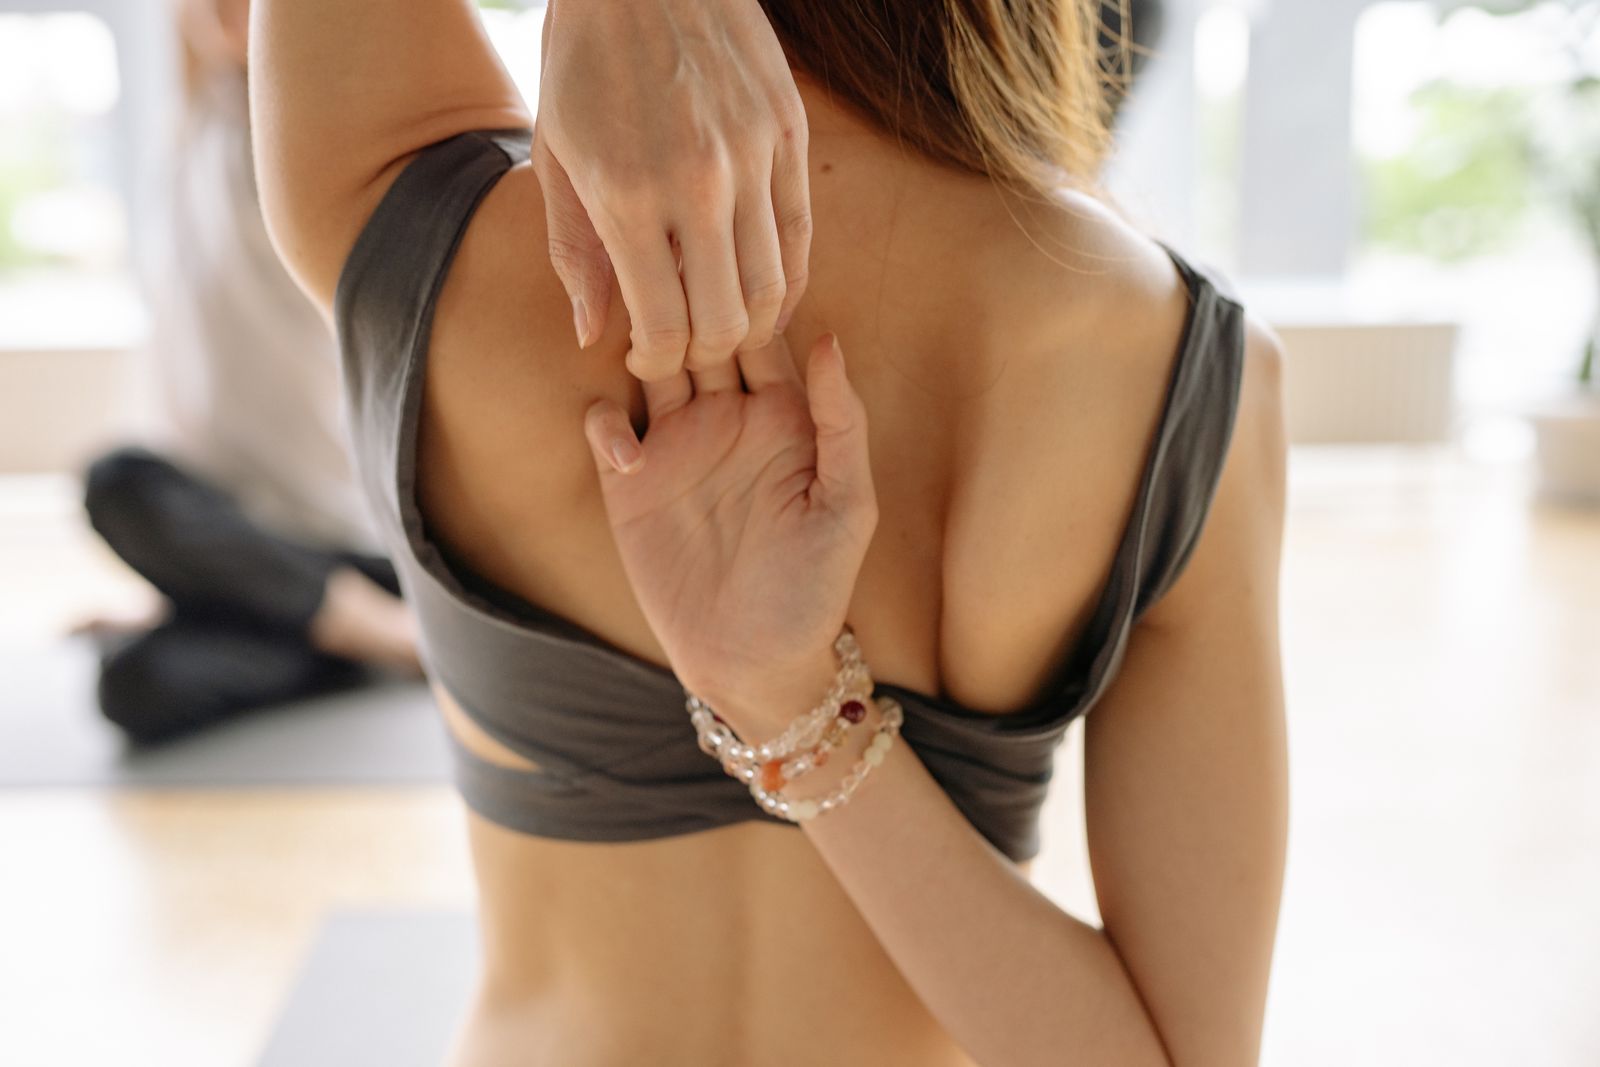
Next, extend your right arm straight out to the side, rotate it internally so the palm faces backward with the thumb pointing down, then bend the elbow and draw the hand up behind your back between your shoulder blades. Raise your left arm overhead, bend the elbow, and reach the hand down your spine to meet the right hand. Try to hook the fingers or, if that’s out of reach, hold a strap between your hands instead of forcing the connection. Hold for five to ten breaths, then release and repeat with the legs and arms reversed. This step-by-step flow pairs well with a general warm-up like Surya Namaskar before you settle into the seated hold.
What Are the Main Benefits of Gomukhasana?
Gomukhasana is valued primarily as a hip and shoulder opener, and the benefits split cleanly into a lower-body effect and an upper-body effect that happen simultaneously. In the legs, stacking one knee over the other creates a deep external rotation stretch through the outer hip and glute of the bottom leg, while the top leg’s inner thigh and hip flexor get stretched as well. In the upper body, the behind-the-back arm clasp opens the front of the shoulder and chest on one side while stretching the triceps and the back of the shoulder on the other, which is a combination most everyday movement never asks the body to do.
Practitioners commonly report that regular practice improves posture, since the pose counteracts the rounded-shoulder, tight-hip pattern that builds up from prolonged sitting. It is also frequently cited as supportive for people who do a lot of upper-body pulling or pressing work, like swimmers, climbers, or lifters, because it restores range of motion that repetitive training can shorten over time. Some traditional sources also associate hip-opening postures like this one with stimulating digestion and circulation in the pelvic region, though this effect is harder to measure than the flexibility gains, which are well documented through simple range-of-motion testing.
Which Muscles Does Gomukhasana Stretch?
Gomukhasana stretches four distinct areas of the body at once, two in the legs and two in the arms, each targeting its own muscle group:
| Body Part | Muscles Stretched |
|---|---|
| Bottom leg (underneath) | Gluteus maximus, piriformis, hip external rotators, iliotibial band |
| Top leg (crossed over) | Hip flexors, inner thigh adductors |
| Raised arm (overhead) | Triceps, latissimus dorsi |
| Lowered arm (behind back) | Anterior deltoid, pectoral muscles |
Because both sides of the body are working differently, Gomukhasana is really two distinct stretches happening in one shape, which is part of why it takes longer to feel “even” on both sides than most poses do.
What Modifications Make Gomukhasana More Accessible?
Very few people can clasp their hands fully behind the back the first time they try this pose, and that is completely normal rather than a sign of poor flexibility. A few simple modifications make the pose accessible regardless of where your flexibility currently stands:
- Tight shoulders: Hold a strap or folded towel between the hands so you can find the same shoulder opening without forcing a grip that isn’t there yet.
- Tight hips or knees: Sit on a folded blanket or a yoga block to raise the pelvis above the knees, taking pressure off tight hips and knees and making it easier to stack the legs comfortably.
- Uncomfortable knee stack: Practice the arm position alone while seated in a simple cross-legged position, or work the leg position separately on your back before combining both halves of the pose.
- New to the shape entirely: Start from all fours (tabletop position), which takes weight off the hips entirely while you find the arm shape.
What Precautions Should You Take Before Practicing Gomukhasana?
Gomukhasana is generally considered an intermediate-level pose because of the combined hip and shoulder demand, so it’s worth building general flexibility through simpler poses first. Avoid or modify the pose if you have a recent or chronic knee injury, since the deep knee flexion required to stack the legs can aggravate meniscus or ligament issues. The same caution applies to shoulder injuries, particularly rotator cuff strains, since the internal rotation required to bring the arm up the back can be provoking if the joint is already inflamed. If you feel sharp or pinching pain in the knee, hip, or shoulder at any point, back off the position rather than pushing through it, and use props liberally rather than chasing the full hand clasp before your body is ready. As with any new pose, if you’re managing a pre-existing joint condition it’s worth checking with a healthcare provider or an experienced yoga instructor before adding it to your routine.
How Does Gomukhasana Compare to Other Hip-Opening Poses?
Gomukhasana sits at the deeper end of the hip-opening spectrum compared to gentler options like Sukhasana or Butterfly Pose, both of which open the hips without the added shoulder component. It’s often introduced after students are comfortable with poses like Vrksasana (Tree Pose) and basic standing balance, since a stable, mobile hip helps with the leg stacking required here. Compared to Pigeon Pose, which isolates one hip at a time in a longer hold, Gomukhasana works both hips in a more symmetrical stacked position and adds the shoulder stretch on top, making it a more efficient full-body opener when time is limited. If your goal is specifically hip mobility for running or squatting, pairing Gomukhasana with other hip-focused work in a broader yoga for flexibility routine will get you there faster than any single pose alone.
When Should Gomukhasana Be Practiced in a Sequence?
Because it is a deep, static stretch, Gomukhasana works best after the body is already warm rather than as an opening pose. Many sequences place it in the middle to late portion of a practice, after standing poses and sun salutations have raised circulation and loosened the major joints. It’s also commonly used as a seated pose leading into meditation or pranayama, since the tall spine position it creates is naturally suited to breathing practices once the hips and shoulders have released. If you’re building your own home sequence, try placing it after a few rounds of Surya Namaskar and a couple of standing poses, then hold it for five to ten breaths per side before moving into your cool-down.
Can Beginners Practice Gomukhasana Safely?
Beginners can absolutely work toward Gomukhasana, but it’s worth approaching the two halves of the pose separately at first rather than attempting the full shape immediately. Practice the leg stack on its own for a few sessions, sitting on a cushion if the hips are tight, until stacking the knees feels stable and doesn’t strain the top knee. Separately, practice the arm clasp using a strap while seated normally, gradually shortening your grip on the strap as shoulder mobility improves over weeks. Once both halves feel reasonably comfortable on their own, combine them in the full pose. This staged approach prevents the common beginner mistake of forcing a full bind before the joints are ready, which is a leading cause of shoulder strain in new practitioners attempting advanced arm positions too soon.
Does Gomukhasana Help with Posture and Desk-Related Tightness?
Yes, this is one of the most practical everyday benefits of the pose. Long hours of sitting shorten the hip flexors, round the shoulders forward, and tighten the chest muscles, and Gomukhasana directly counters all three patterns in one hold. The seated hip stack stretches the muscles that get compressed by chair-sitting, while the arm position pulls the shoulders back into a more neutral, open position and stretches the chest muscles that tend to shorten from hours spent hunched over a keyboard. People who sit for most of the day often notice that a few rounds of Gomukhasana, held for a minute or so per side, produces a more immediate sense of relief through the upper back and hips than a quick standing stretch does, because the seated position isolates the stretch more precisely.
How Does Gomukhasana Fit into a Broader Yoga Practice?
Gomukhasana is typically classified as a seated hip and shoulder opener within the broader family of hatha and Iyengar-style asanas, and it pairs naturally with other grounding, introspective poses rather than dynamic, cardio-driven sequences. If you practice Hatha Yoga, you’ll likely encounter it as part of a slower-paced seated sequence, whereas in faster Vinyasa Yoga classes it tends to show up as a cool-down or floor-based pose after the standing sequence is complete. It also has a natural place in restorative or Yin Yoga practices, where longer holds of two to five minutes let the connective tissue around the hip and shoulder release more fully than a shorter dynamic hold allows.
Questions People Ask About Gomukhasana
What does Gomukhasana mean in English?
Gomukhasana translates to “Cow Face Pose.” The name comes from the Sanskrit words “go” (cow) and “mukha” (face), describing how the crossed shins are said to resemble a cow’s mouth while the elbows resemble its ears when the arms are clasped behind the back.
Is Gomukhasana good for beginners?
Gomukhasana is generally considered intermediate-level because it combines a deep hip stack with a shoulder bind, but beginners can work toward it gradually. Practicing the leg position and arm position separately, using props like a strap or cushion, makes it accessible well before both elements can be combined comfortably.
What are the main benefits of Gomukhasana?
Gomukhasana stretches the hips, outer thighs, shoulders, chest, and triceps simultaneously, making it an efficient full-body opener. It’s commonly used to counteract posture problems from prolonged sitting and to restore shoulder range of motion lost to repetitive upper-body training.
Can I do Gomukhasana if I have tight shoulders?
Yes, using a strap or folded towel between your hands is the standard modification for tight shoulders. Hold the prop with both hands behind your back and gradually shorten your grip over weeks as mobility improves, rather than forcing your fingers to touch before the joint is ready.
How long should you hold Gomukhasana?
A typical hold is five to ten breaths, or roughly 30 to 60 seconds per side, which is enough time for the hip and shoulder tissue to begin releasing without straining the joints. In slower-paced or Yin-style practices, holds of two to five minutes per side are common for a deeper release.
What is Gomukhasana called in Hindi?
In Hindi and Sanskrit-based yoga terminology, the pose is referred to as “Gomukhasana” itself, since Sanskrit and Hindi share the same root words: “gau” or “go” for cow and “mukh” for face. It is commonly described simply as “Gaumukhasana” or “cow-face pose” (गौमुखासन) in Hindi-language yoga instruction.
Try This for Yourself
Reading about Gomukhasana is a useful start, but the pose is really learned through feedback on your alignment, breathing, and pacing, which is exactly what a live class provides. If you’d like personalized guidance on easing into the full hip and shoulder shape safely, join a session with FitStrot’s online yoga classes and get a routine tailored to your current flexibility and goals.
Related reading: Yoga Poses & Asanas, Tadasana, Yoga for Flexibility, Benefits of Yoga, and FitStrot’s online yoga classes.